


Purity 4.0 Upgrade
Grand Purity WordPress Theme update is finally here!
We're glad to announce that Purity is now fully compatible with WordPress 5.2+, PHP 7+ and compliant with the most recent ThemeForest requirements.
Changes
However, to meet those new requirements, major changes were introduced:
- A completely new Theme Options panel.
- Shortcodes, widgets and custom post types have been moved to a separate plugin "Purity Core".
Upgrade Guide
If you're upgrading from a previous version of the theme, we prepared some instructions so the process can be as easy as possible:
1. Update the theme
First step is to update the theme. The easiest way is to install the Envato Market plugin:
https://envato.com/market-plugin/
Once the plugin is configured, automatic updates will be enabled for all ThemeForest products, including Purity.
You can also perform one of the two manual theme update methods:
- FTP - Using a program like FileZilla, connect to your host/server (you will find the FTP login information in your host administration panel) and navigate to your /wp-content/themes/ folder. You will find a folder named “purity” there. Open it. That’s the place where you upload all of the new files from the /purity/ folder (make sure that you replace the old ones). After you are done, disconnect and close the program.
- Theme reinstallation - Note that this method may not work properly on 100% hosts and you may loose your Theme Options data (just the panel data, there is no risk of loosing page or posts content) so I truly recommend to use the first method. Login to your Admin Dashboard, open the Appearance / Themes menu, switch back to default theme and delete Purity. Now you just follow the steps of a standard theme installation: Add new theme / Upload / choose the purity.zip file and press Install.
2. Migrate Theme Options
Once you update the theme, you'll notice the Theme Options panel looks different. That's because we've completely replaced the old, redundant options framework with a modern library. For those who're upgrading the theme, we've prepared the "Migrate Options" tab in the new Theme Options panel:
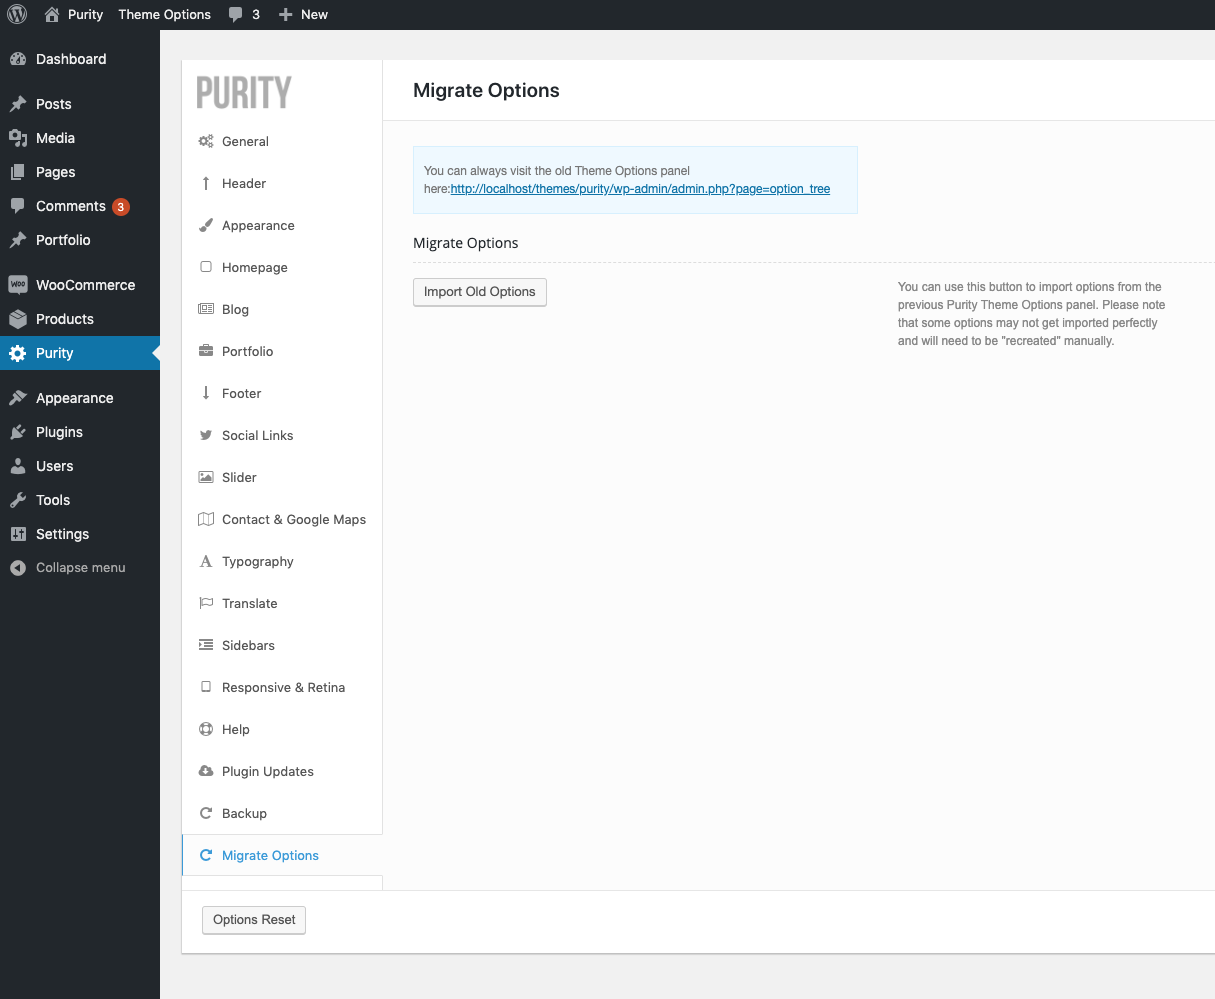
You may notice that there is also a link to the old Theme Options panel. Yes, that's right - we have NOT removed it. You can still preview your old options there. However, that is only the case for websites where the old version of Purity was used before.
To migrate your options just click the "Import Old Options" button and the options panel will automatically refresh when it's done. Please note that not all options may be perfectly imported so you may need to re-set some of them manually. We apologize for that!
3. Install required and recommended plugins
To meet the new ThemeForest requirements, we had to move some of the core functionalities like shortcodes, custom post types and widgets outside of the theme. However, do not worry! We prepared a dedicated plugin that brings all of those: "Purity Core". Once the new version of theme is activated, you will see a notice letting you know about required and recommended plugins. Just click the "Begin installing plugins" button:

You may also visit the Appearance / Install Plugins menu manually:
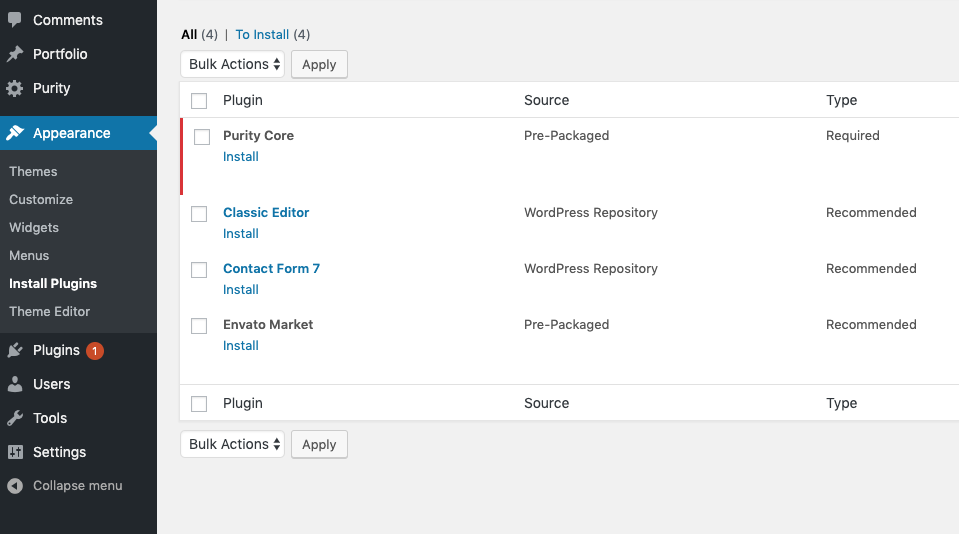
We highly recommend the following plugins as well:
- Classic Editor - the plugin brings back the old-fashioned editor (pre-Gutenberg).
- Envato Market - for automatic theme updates.
- Contact Form 7 - easy to use and manage contact forms.
4. Contact Form
To meet the new requirements, the contact form has been removed. However, you can install the most popular and free contact form plugin directly within Appearance / Install Plugins menu (see point above). The contact form can later be embedded into any page or post via a shortcode.
5. Google Maps
Google Maps is no longer a free service and requires an API key so you can use it on your website. However, we made it as easy as possible to include the API key on your website. Just visit the Theme Options / Contact & Google Maps tab:
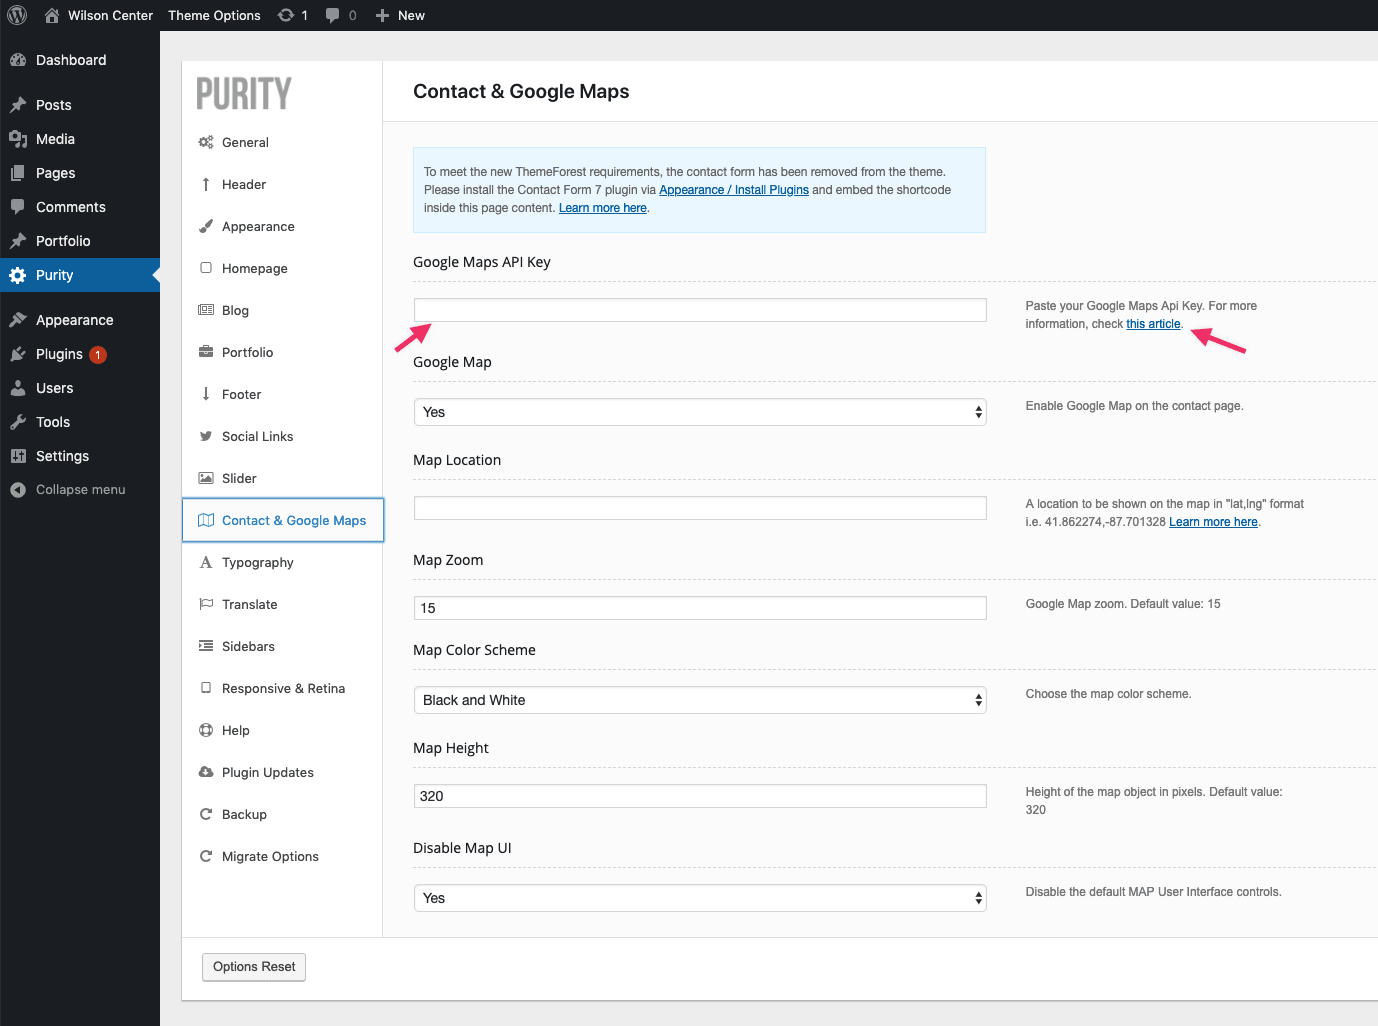
"this article" links will open a new tab in your browser with our article regarding the API key. Once you obtain it, just paste it into the "Google Maps API key" field and you're good to go!